Monday, 20 January 2014

Undefined

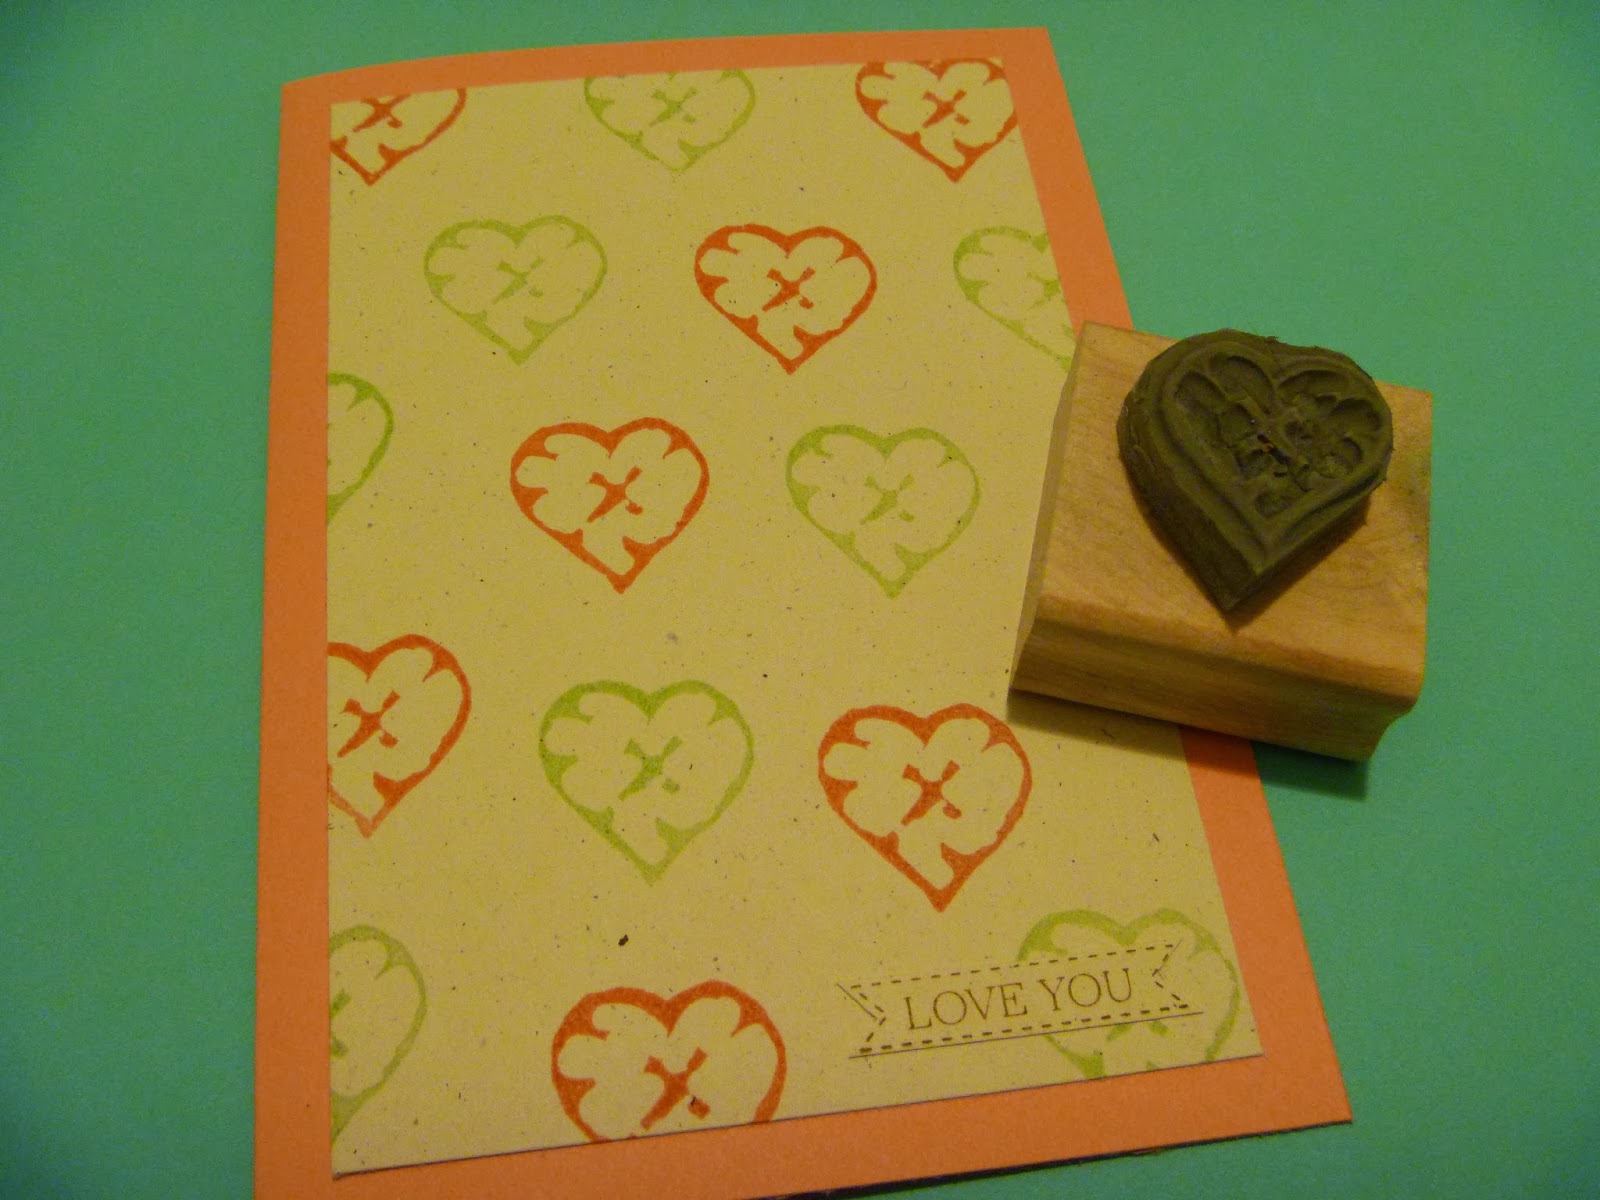
Here is my own stamp that I carved using Stampin' Up's Undefined kit. The stamp itself isn't all that pretty, but I'm happy with the image it produces. I've used Crisp Cantaloupe, Pistachio Pudding and Baked Brown Sugar as the colours on this rather lovey-dovey card.
Here is a birthday card I recently made for a friend. It uses a stamp set and punch that will both be available during Sale-a-bration - Banner Blast and the co-ordinating Banner punch. Such a lovely stamp set - perfect for combining with the Owl Builder punch.


Thursday, 9 January 2014

Happy New Year

I hope you have had a lovely Christmas. This card is a sneak preview of Petal Parade, a gorgeous stamp set that is on its way for Sale-a-bration - a very exciting time of the year when you can get free exclusive Stampin' Up products with orders of £45. There are also additional hostess benefits if you host a party during this time. Sale-a-bration runs from 28th January to 31st March and is my favourite time in the SU calendar.

My congratulations card combines Smoky Slate and Crushed Curry cardstock with Eastern Elegance Designer Series Paper. I have used two stamps from Petal Parade (there are five in the set), along with the Pansy and Boho Blossoms punches.
Here are some tulips in a vintage enamel coffee pot that always reminds me of Pool Party. My upcoming class dates will be following shortly, so please watch this space!


Friday, 13 December 2013

More Snowflakes

This week I have made some snowflakes for the Momentary Art Project's Winter Wonderland in New Brighton. Last year I made a fish from fused plastic bags. We are asked to use recycled materials, so my snowflakes are made from the insides of bill envelopes and delivery notices.


I loved making these! There are some wonderful paper designs to be found inside bills...

Monday, 25 November 2013

A Tutorial


Here is a card front that I am taking to our next team meeting in December. I thought that I would share the tutorial with you, as my photo really does not do justice to the sparkle! All products used are Stampin' Up and can be ordered from me.

1. Create your background by rubbing a sponge on Pistachio Pudding, Pool Party and Coastal Cabana Classic Stampin' Pads. Rub the sponge on a piece of Very Vanilla cardstock.

2. Using a Baked Brown Sugar ink pad, stamp over the background with the Post Card stamp.

3. Using a Whisper White ink pad, stamp a snowflake from the Snowflake Soiree set (the third in size) on the left of the postcard. Stamp the smallest snowflake twice on the right.

4. Using Versamark, stamp the snowflake from the Hostess set, Warmth and Wonder about four times and emboss using Iridescent Ice Stampin' Emboss Powder and a heat tool.

5. Randomly stamp the snowflake across the card using Coastal Cabana.

6. Cut out the postcard.

7. Using a Perfect Plum ink pad, stamp the reindeer from Warmth and Wonder on a piece of Very Vanilla cardstock. Cut out using the Postage Stamp punch, then stamp the snowflake in Pool Party in the corner. Sponge Baked Brown Sugar on the edges of the stamp and adhere to the corner of the card. Embellish with some rhinestones.

8. Stamp the sentiment from Warmth and Wonder and then you are done! Ready to turn your postcard into the finished card of your choice.

I hope that you enjoyed my tutorial! April xx

Friday, 22 November 2013

Stamp Carving

I have been waiting for this to arrive over here for a while. A great way to produce your own stampy work of art or to give as a fabulous gift!
Sam and I had a wonderful time at Hoylake Evangelical Church's craft fair last night. The organisers were so kind and welcoming (we have never had welcome chocolates waiting for us on a stall before!) The fair was very busy and there was a lovely, festive atmosphere. We had a great time chatting with customers - a really enjoyable evening!

Wednesday, 20 November 2013

Craft Fair

I'm making lots of stuff for a Christmas Craft Fair at Hoylake Evangelical Church on Thursday, 21st November, 7.30-9.30pm. I'm sharing a stall with my crafty friend, Sam. We have done quite a few craft fairs over the years and always enjoy having a good chin-wag and a nosey at what other stall-holders are making. We saw some great knitted cacti a while back. They were even in their own greenhouse! Anyway, back to the making that is in progress. Here's a card using the lovely Ornament Keepsakes set. The petals of the poinsettia are baubles.
 Here's a reindeer candy cane holder. Rudolph is made using the versatile Owl Builder punch and I have made the holder using the Envelope Punch Board. That candy cane is clashing with my colour scheme, but never mind, I'll get over it!
Finally, another Ornament Keepsakes creation. 
I had such a lovely time at my last workshop. I was laughing (and die cutting) so much, I forgot to take any photos. However, some beautiful cards and boxes were made and it ended up being quite a late night!


Wednesday, 6 November 2013

Mini Pizza Boxes

Such a busy old time lately with Halloween and Bonfire Night. It's been nice to get back to some crafting. Here is a mini pizza box made from Real Red and Tempting Turquoise card. I've used Snowflake Soiree with some silver embossing powder and silver glimmer paper. This is going to be filled with tea lights stamped with the smallest snowflake from that set.
Here's another one in Smoky Slate with a band made from Winter Frost DSP. This is a project I'm taking along to a training day tomorrow. Just a pasta salad to make tomorrow morning and then I think I'm just about organised...
Here is a card I have made for a FB swap. Bit of a Real Red and Tempting Turquoise theme going on with me at the moment! This is the Wishing You stamp set, with a flower made using the Boho Blossoms punch. 
And finally a few tags! Hope you are having a lovely week x